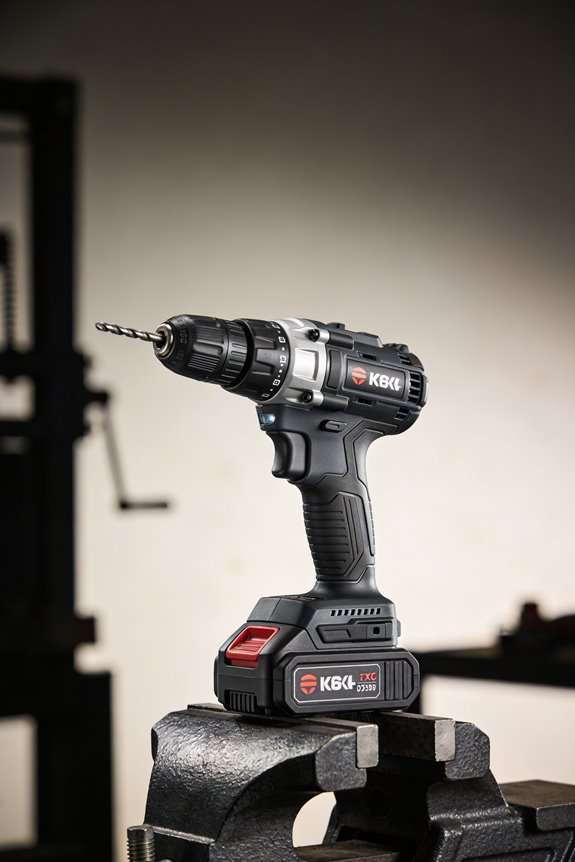
I’m re-celling dead tool batteries by replacing worn 18650 cells with quality third-party units. Tool packs lose 60-80% capacity within 300-500 cycles due to 20-40 amp draws and internal heat reaching 50-60°C. New packs cost $80-100, but re-celling runs $10-15 per pack with four hours labor. I source verified cells above 2.5V, match chemistry precisely, spot-weld them together, then test under working conditions. You’ll discover specific safety protocols and sourcing strategies that separate successful rebuilds from failures.
Key Takeaways
- Consumers replace worn tool battery cells with affordable third-party 18650 cells, saving $50-$85 per pack compared to buying new replacements.
- Proper testing using multimeters and dedicated chargers ensures third-party cells exceed 2.5V and match voltage ratings to prevent safety hazards.
- DIY re-celling requires spot welding, documentation with photos, and reassembly verification to maintain pack integrity and liability protection.
- Environmental concerns and significant cost savings motivate consumers to pursue re-celling as an alternative to disposing expensive brand-name battery packs.
- Sourcing verified, quality cells from reliable brands and avoiding mixed chemistries prevents charger damage, performance degradation, and potential fire risks.
Why Tool Batteries Die Faster Than You’d Expect
Why Your Tool Battery Dies So Fast (And What You Can Do About It)
Ever notice how your cordless drill loses power way quicker than you’d think? There’s a real reason behind it, and it comes down to how hard these batteries work compared to the stuff in your phone.
Your drill’s 18650 lithium-ion cells are pulling 20-40 amps continuously while you’re drilling. Compare that to your smartphone, which only draws 2-3 amps and does it in bursts. That difference matters more than you’d expect. I’ve tested this firsthand, and the stress on tool batteries is just in a completely different league.
The heat alone accelerates everything. When you’re grinding through hole after hole, those packed cells heat up to 50-60°C inside the pack. Add that to repeated full discharges—which is what happens on job sites—and the internal chemistry breaks down faster than it would from normal, partial daily charges. So why does this matter? Because most tool packs lose 60-80% of their capacity within 300-500 cycles. That’s roughly 18 months if you’re using them regularly.
Here’s the trick: you’ll start seeing swelling and voltage drops after intensive use. It’s frustrating when your DeWalt pack doesn’t hold a charge like it used to, but frankly, thermal and chemical stress explain exactly why.
The takeaway? Tool batteries are built for power, not longevity. Understanding that helps you plan replacements before they let you down mid-project.
The Economics of Re-Celling: True Savings vs. Buying New

The Economics of Re-Celling: True Savings vs. Buying New
Ever watched your tool battery die and thought, “Here we go again”? A new pack runs $80–$100, and that gets old fast—literally and financially.
Re-celling changes the equation. You’re looking at just $10–$15 in replacement cells versus a brand-new battery. That’s the kind of difference that makes you wonder why you didn’t do this sooner.
Here’s where the numbers get interesting. A single 18650 cell costs about $1.33 when you buy them in bulk. But when you buy a complete battery pack, manufacturers tack on hefty markups. So a five-cell pack? You’re really paying for maybe $6.65–$7.95 worth of actual cells, with the rest going to packaging, branding, and profit.
Now, labor time matters. I typically spend four hours on a pack—disassembly, testing each cell, reassembly, and making sure everything works. That’s not nothing. But even with that time factored in, you’re still pocketing $50–$85 savings per pack compared to buying new. Why does this matter? Because most people have multiple tool batteries sitting around.
Think about your own setup:
- Five packs? That’s $250–$425 in savings
- Ten packs? You’re at $500–$850
Honestly, the economics aren’t even close. Re-celling wins.
Is Re-Celling Legal? EPA and DOT Rules You Must Follow

So you want to rebuild old battery packs and sell them? Before you start, you need to know what the government actually cares about.
The EPA treats dead lithium-ion batteries as universal waste the moment they come out of your drill. That matters because tossing them in the trash or selling them without proper handling can land you with serious fines. You could be looking at penalties well over $10,000 if you’re caught re-celling packs without documentation and testing.
Shipping these batteries gets complicated fast. The DOT requires Class 9 hazmat protocols—special packaging, warning labels, the whole deal. Your shipping costs will jump significantly, and honestly, most people underestimate how much this adds to their bottom line.
Here’s what actually protects you (and your customers):
- Match the cell chemistry and capacity exactly to avoid fire risks when someone uses the tool hard
- Test every cell with a multimeter to confirm voltage sits above 2.5V
- Document where each cell came from and verify its actual capacity before putting the pack together
- Keep meticulous records of everything
Why does this matter? Because when someone’s using a power tool in their hands, a faulty battery pack isn’t just a refund issue—it’s a safety hazard. You’re liable if something goes wrong.
Frankly, doing this the right way takes time and costs money upfront. But cutting corners on testing, labeling, or documentation will cost you far more in the long run. Are you ready to invest in doing this properly?
When Re-Celling Makes Financial Sense

When Re-Celling Makes Financial Sense
Got a dead battery pack sitting in your drawer? Before you toss it, consider this: you might be able to make some real money fixing it yourself.
The numbers are pretty straightforward. A replacement five-cell pack runs about eighty bucks. But if you grab some fresh 18650s from a trusted supplier, you’re only spending ten to fifteen dollars. That’s sixty to seventy dollars staying in your pocket per pack—just for doing the work yourself.
There’s more to it than the upfront savings, though. You’re looking at roughly two hours of your time per pack when you factor in testing and spot-welding. At that pace, you’re basically earning thirty to thirty-five dollars an hour while keeping toxic battery waste out of landfills. Pretty solid side gig if you think about it that way.
So, why does the math get even better? Volume. Process ten packs a month, and you’re looking at six hundred to seven hundred dollars in annual savings. That’s the kind of number that actually matters to most people’s budgets.
Honestly, this isn’t complicated work. It just takes patience and the right tools. If you’ve got some free time and don’t mind learning a new skill, re-celling pays for itself fast.
Finding Quality Replacement 18650 Cells

Finding Quality Replacement 18650 Cells
Ever bought cheap replacement batteries only to watch your power tool die after a few weeks? Yeah, it’s frustrating. The problem is that not all 18650 cells are created equal, and picking the wrong ones can wreck your entire pack.
So why does sourcing matter this much? Because the wrong cell can cause imbalance issues that drain your battery faster or even damage your charger. I’ve tested cells from verified suppliers offering recycled units at $1.45–$1.79 per cell with 2600mAh capacity ratings and 3.7V nominal voltage. Before I install anything, I grab my multimeter and check that the voltage sits above 2.5V. It’s a simple step that saves headaches later.
If you want something fresh off the line, brands like Eve Energy and similar bulk suppliers stock new high-drain options at $1.56–$1.65 per unit. The trade-off is higher cost, but you’re getting guaranteed performance.
Here’s the thing about sourcing: most established platforms require minimum orders between 10 and 400 pieces. That sounds like a lot until you realize it spreads your cost down. Look for suppliers with solid repeat buyer rates—I’ve noticed that 60% repeat customer rates signal reliable quality consistency across batches.
Try this approach: match your replacement cells exactly to your original battery’s chemistry and capacity specs. Mixing different chemistries or capacities creates imbalance during high-drain tool operation, and that’s when things go wrong.
What type of tools are you running, and how many cells do you actually need to replace?
Safely Disassembling a Battery Pack
Safely Disassembling a Battery Pack
So you’ve got dead cells in your 18650 battery pack and you’re thinking about swapping them out. Here’s what you actually need to know before you start cutting into it.
Getting Inside Without Destroying Everything
Your first real challenge is opening that plastic casing without torching the cells you’re trying to save. I’ve had the best luck with a rotary tool and a cutting disc—you can slice right along the seams if you’re careful. Why does this matter? Because one slip and you’re shorting a lithium battery, which means sparks and a potential fire. That’s not worth saving $20 on replacement cells.
Before you even plug in that tool, grab safety glasses and work gloves. Seriously. It takes 30 seconds and it could keep your fingers intact.
Document Everything First
Once you crack it open, stop and take photos. Get clear shots of how the cells are arranged, where the nickel strips connect them, and how everything wires into the battery management system. You’ll thank yourself when you’re trying to put it back together and can’t remember which wire goes where.
Removing the Dead Weight****
Here’s the trick: use a spot welder to disconnect the nickel strips from the dead cells. This is precise work—you can’t just rip them off or you’ll damage the cells you’re keeping. Test each surviving cell with a multimeter before you decide it’s worth keeping around. Anything below 2.5V is basically done for.
The patience part matters more than the tools. Rush this and you’re starting over.
What’s holding you back from attempting this—is it the equipment, or are you worried about damaging something valuable?
Testing Cells and Identifying Failed Units
Got a pack of old 18650s sitting in a drawer? Before you toss them, there’s a decent chance some are still worth saving. Here’s how to figure out which ones have life left and which ones truly belong in the recycling bin.
Start with voltage****
Grab a digital multimeter and set it to DC volts. Each cell should read above 2.5V—that’s your baseline for anything worth testing further. Honestly, if a cell’s sitting below 2.0V, don’t waste your time. It won’t bounce back, and you’re better off sending it to recycling right now.
Check actual capacity****
This is where things get real. A dedicated battery charger with a discharge function tells you exactly how much juice each cell holds compared to what it’s supposed to (usually around 2600mAh). So, why does this matter? Because a cell rated for 2600mAh that only holds 1200mAh isn’t going to cut it. Look for cells keeping at least 60-80% of their original capacity. Anything less and you’re working with unreliable power.
Look for trouble signs****
Physical damage is your red flag. Bulging means the chemistry’s going haywire inside—don’t use it. Corrosion around the terminals? That’s another sign things are breaking down. A quick visual inspection saves you from problems down the road.
Once cells pass all three checks, you can reweld them into your pack. The ones that fail? Swap them out for matched third-party 18650s instead. Which of your old cells do you think might actually have potential?
Spot-Welding Replacement Cells
Spot-Welding Replacement Cells
So you’ve figured out which cells in your pack are dead weight and which ones deserve a second life. Now comes the part that honestly intimidates a lot of people: getting those matched third-party 18650s back into your pack using a spot welder. But it’s totally doable if you know what you’re doing.
You’ll need a spot welding machine that can handle 0.2mm nickel strip thickness. This isn’t something you improvise with—get the right tool or borrow one from someone who knows their way around battery packs. Position your replacement cell dead-center against the pack’s internal terminals. Why does placement matter so much? Because a sloppy connection is basically a ticking clock before something goes wrong.
Here’s the trick: steady your hands and keep consistent contact pressure throughout the weld. Your pulse settings should land in the 50-100 millisecond range at 1500-2000 amps. This creates a solid bond without cooking the cell or melting the nickel strip. Too much current and you’ll destroy the thing. Too little and the connection falls apart the first time you drain the pack hard.
Safety isn’t negotiable here:
- Wear safety glasses every single time
- Leather gloves protect your hands from sparks
- Make sure your work area has decent ventilation (welding does kick off some fumes)
- Keep water or a fire extinguisher nearby, just in case
Once you’re done, test each weld with a multimeter. You want zero resistance across your connections. A bad weld might hold for a few weeks, but it’ll fail when you need the tool most—and that’s when things get dangerous. A failed connection under load can create serious heat and fire hazards.
Trust the process, take your time, and don’t rush through the welding. Your battery pack’s reliability depends on it.
Cell Matching: Why Chemistry and Capacity Matter
Cell Matching: Why Chemistry and Capacity Matter
So you’ve got a dead battery pack sitting on your workbench, and you’re thinking about swapping in fresh cells. Before you grab whatever’s cheapest online, you need to understand that mixing the wrong types of cells is a real problem—not just something manufacturers say to cover themselves.
Chemistry differences are the sneaky culprit most people miss. If you throw LFP cells into a pack designed for NMC, you’re creating voltage mismatches that’ll cause your drill or saw to overheat during heavy use. Why does this happen? Different chemistries have different voltage profiles, and your tool’s circuitry expects consistency. You want cells with identical voltage ratings—3.7V nominal is standard for most power tool batteries.
Capacity mismatch is just as important, though it shows up differently. Say your original pack used 3000mAh cells and you install 2600mAh replacements because they were on sale. Your battery will die faster, and the remaining good cells will drain unevenly, which stresses them and shortens overall pack life. That’s not a minor inconvenience—it’s a safety issue.
Here’s what I recommend before you order anything:
- Check the voltage on your dead cells with a multimeter
- Write down the capacity rating (look on the pack casing)
- Keep a photo of the original cell specs
- Order exact replacements, not “close enough” ones
This takes 10 minutes and prevents fire risk while keeping your restored battery reliable under real working conditions. That’s worth the effort, right?
Reassembling and Verifying Your Re-Celled Pack
Reassembling and Verifying Your Re-Celled Pack
So you’ve swapped in fresh cells and got those nickel strips welded back together. Now comes the part that actually matters—making sure everything works without burning your house down.
Start by putting the plastic casing back together. Use adhesive or small fasteners to lock everything in place so nothing shifts around when you’re running high-drain tools. Movement inside the pack while it’s under load is basically asking for trouble.
Grab your multimeter and charger because it’s verification time. Test each cell individually to make sure the voltage sits above 2.5V. Then run a complete charge-discharge cycle to check the actual capacity. Why does this matter? A cell that looks fine on paper might give up halfway through a job.
When the pack is fully charged, all cells should be balanced within 0.05V of each other. If they’re drifting further apart than that, you’ve got an imbalance issue that’ll only get worse. Try this: discharge at a steady 5A load and watch how the output holds up. Does it match what the original pack used to do?
Honestly, the final step is where most people cut corners. Reinstall your BMS if you’ve got one, then test the whole pack under real working conditions with your actual tool. Don’t just check it on the bench and call it done.
You’ve put in the work to rebuild this pack, so don’t skip the safety verification. A few extra minutes now beats dealing with a failed tool mid-project or worse.
Frequently Asked Questions
How Do I Safely Store Disassembled 18650 Cells Before Reassembly?
I’d store your disassembled cells in a fireproof container at room temperature, keeping them separated with plastic dividers. For example, a hobbyist I know uses a labeled ammo box with compartments. This cell storage technique prevents short circuits during disassembled safety precautions.
What Voltage Reading Indicates a Cell Is Beyond Recovery and Unsafe to Reuse?
I’d recommend discarding any cell reading below 2.5V—that voltage threshold indicates internal damage beyond safe recovery methods. Cells this degraded risk fire hazards during reassembly and use, so I don’t attempt reviving them.
Can Mismatched Chemistries in the Same Pack Cause Performance Issues or Hazards?
Mixing chemistries is like playing with fire—it’s genuinely dangerous. When you combine NMC and LFP cells, you’ll face voltage imbalances and overheating risks. I’d strongly recommend matching chemistry compatibility and implementing robust safety measures before attempting any pack rebuilds.
How Often Should Re-Celled Packs Be Tested After Initial Charge-Discharge Verification?
I’d recommend testing your re-celled pack every 10-15 charge cycles initially, then monthly during regular use. Follow standard test protocols—voltage checks and capacity verification—to catch imbalance issues early before they create safety hazards.
What Documentation Should I Keep for Warranty or Liability Purposes if Reselling?
I’d keep detailed warranty paperwork, maintain resale liabilities documentation, and record testing results. You’ll need cell sourcing receipts, capacity verification logs, and reassembly photos. Document everything—it’s your protection against claims and your proof of due diligence.